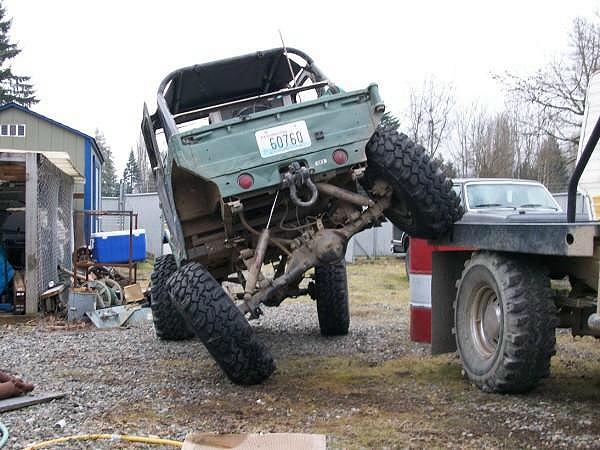
The rig shown here belongs to Derek Course. It’s a 1972 Suzuki LJ20 that uses a a set of cut rear leaf springs from a 1983 2WD Ford Ranger for 1/4 elliptical leafs. The top links in the 4-link suspension are John Deere top links (unmodified). The lowers are cut and stuffed with a front Dana 44 axle shaft for strength (Hey, they were the right diameter!). The shocks are for a Ford F250 Super Duty with a 3-inch lift.
What is a rear 1/4 elliptical suspension?
A 1/4 elliptical suspension uses a leaf spring that’s been cut in half, well…..a little longer than half (need some length for attaching to the frame). The cut end is mounted to the bottom of the frame (upside down) so that the arch is curved down instead of up. The end of the leaf then attaches to a shackle that is mounted directly to the axle tube.
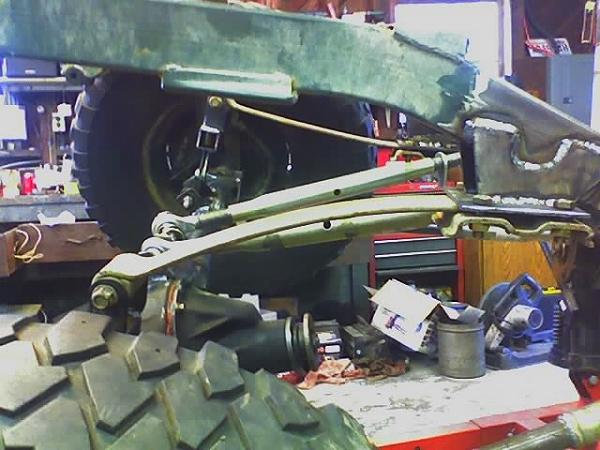
In this case, the builder made a custom shackle that pivots left to right as well as forward and back. Although the photo shows a single leaf, the owner of this rig ultimately chose a 3-leaf pack when he was done. He also radiused the upper plate.
The owner cautions other builders to radius your sandwich plates well where the spring protrudes. The upper one on his wasn’t radiused at all, and the spring snapped there twice before he radiused it. All has been well since.
A typical leaf spring mounts in front of, and behind the axle and locates it on the vehicle. A leaf in a 1/4 elliptical only provides the lift (height) for the suspension. It doesn’t locate the axle like a traditional leaf does. In order to locate the axle under the vehicle, the 1/4 elliptical is used in conjunction with a 4-link set-up.
The 4-link needs to be set-up before you can add the 1/4 elliptical leafs.

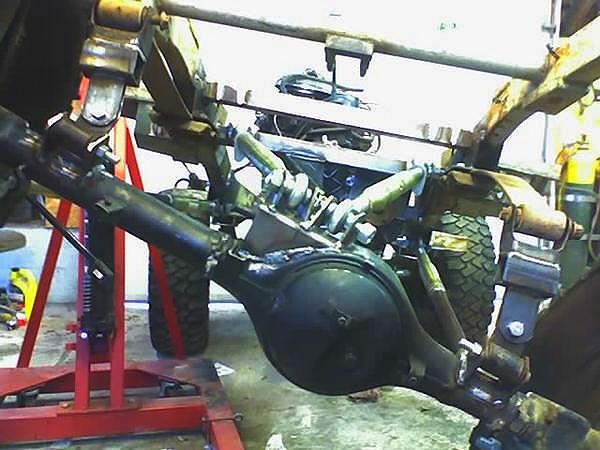
(4-link bars mock up)
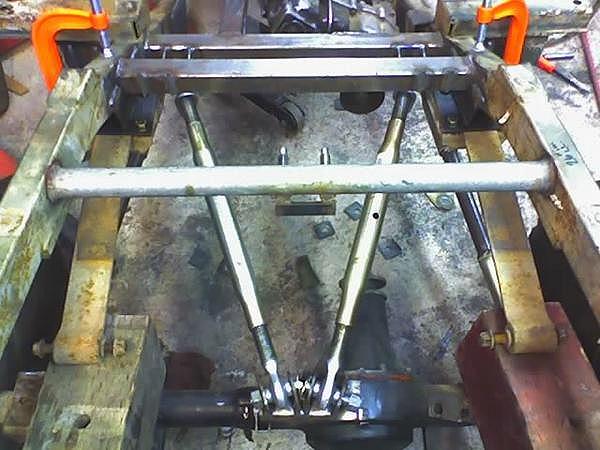
(4-link mock up. Adding the 1/4 elliptical leafs)
There’s more to building a 4-link than adding a couple of bars under the frame and attaching it to the axle. Properly building a 4-link involves numerous measurements and angles. It also involves material strengths since you have to make sure the tubes (links) you use won’t bend and fail on the trail. We STRONGLY suggest that you read the article on 4-links HERE in order to properly build a 4-link suspension before you begin.
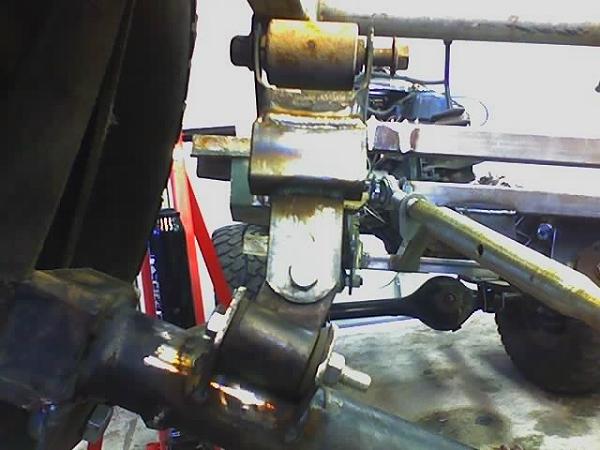
The owner found that key points in setting up his links were link separation at the axle, upper links being 70% of the length of the lowers, and getting the links as parallel to the ground as possible. Once the 4-link is in, you can find a good spot for the springs, trying to get the spring eye just forward of the axle when the spring is compressed as it would be at ride height. This is basically just to get a good shackle angle for a soft ride and the best articulation. Then once you get the springs mounted at the frame, you can put blocks between the axle and spring eyes to let the weight of the rig set on the springs, and build your shackle to set the ride height. Obviously you’ll want to consider the general height of the shackles when you mount your springs, but you can fine adjust ride height from there.
A 4-link 1/4 elliptical rear suspension can provide a great deal of flex (suspension travel).