REMOVAL & INSTALLATION
NOTE: Disconnecting the battery cable on some vehicles may interfere with the functions of the on board computer systems and may require the computer to undergo a relearning process, once the negative battery cable is reconnected.
- Disconnect the negative battery terminal at the battery.
- Label the distributor cap terminal towers to correspond with their applicable cylinders. For example, trace the No. 1 cylinder spark plug wire to the distributor cap and number that cap terminal tower with a “1”.
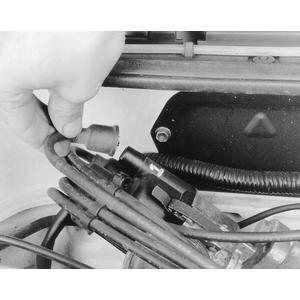
- Label and disconnect all wires and vacuum hoses from the distributor.NOTE: Do not bend or twist the spark plug wires, otherwise internal plug wire damage may result. Grip the wire boot when removing or installing the wires.
- Matchmark the No. 1 cylinder terminal tower to the distributor housing, then remove the distributor cap. Label and detach all of the spark plug wires from the distributor cap, then remove the cap.
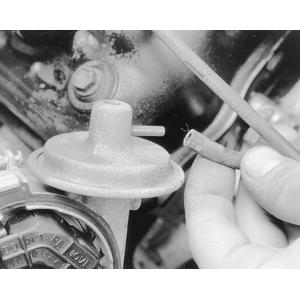
Disconnect the rubber hose from the vacuum advance canister . . .
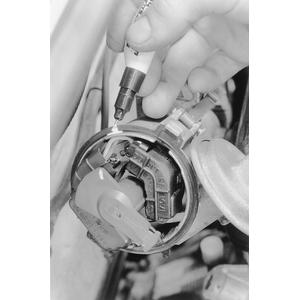
. . . then matchmark the rotor position on the distributor housing . . .
. . . and the distributor housing position on the mounting flange for ease of installation
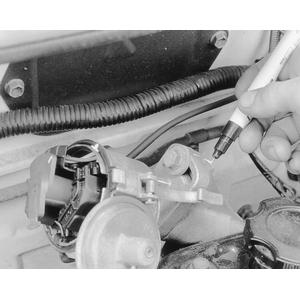
Remove the distributor hold-down bolt . . .
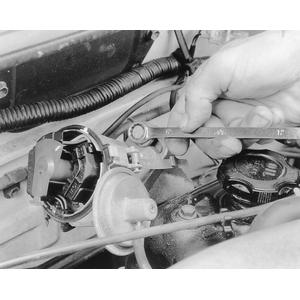
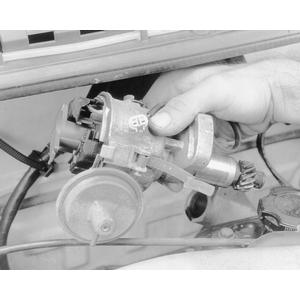
. . . then slide the distributor up and out of the engine
- Remove the distributor cap, as described in Section 1.
- Rotate the crankshaft clockwise until the distributor rotor points to the No. 1 cylinder mark on the distributor housing.
- Matchmark the distributor housing position on the engine.
- Remove the distributor flange bolt, and remove the distributor by carefully sliding it up and out of the engine.NOTE: Do not crank the engine with the distributor removed.
To install:
- If the crankshaft was not rotated while the distributor was removed from the engine (timing not disturbed), perform the following:
- Insert the distributor in the engine, ensuring that matchmarks on the distributor housing, engine and rotor are aligned.
- Tighten the flange bolt until secure, then install the distributor cap.
- Reattach all of the wiring and vacuum hoses to the distributor.
- Connect the negative battery cable, then inspect and adjust ignition timing as necessary.
- If the crankshaft was rotated while the distributor was removed from the engine (timing disturbed), perform the following:
- Rotate the crankshaft in a clockwise position until the Top Dead Center (TDC) timing mark on the flywheel (1986–88 1.3L engines) or crankshaft pulley (except 1986–88 1.3L engines) is aligned with the TDC timing matchmark on the transmission case (1986–88 1.3L engines) or engine timing mark tab (except 1986–88 1.3L engines).NOTE: After aligning the 2 timing marks, remove the cylinder head cover to visually ensure that neither rocker arm is riding on the peak of its camshaft lobe at the No. 1 cylinder. If one (or both) of the arms is (are) found to be riding on the camshaft lobe peaks, turn the crankshaft another 360 degrees until the same 2 marks are realigned.
- Turn the distributor rotor so that it points to the No. 1 cylinder terminal tower mark on the distributor housing.
- Connect all vacuum and electrical wires to the distributor and cap.
- Connect the negative battery cable and set the timing to specification.
Firing Order:
1.3L and 1.6L Engines Firing order: 1-3-4-2 Distributor rotation: clockwise