Removal and Installation
- Raise and safely support the vehicle. Remove the front wheels.
- Remove the caliper mounting bolts and move the caliper out of position with the brake line attached.WARNING
Do not allow the caliper to hang on the brake hose, otherwise the flexible rubber hose may be damaged. Support it by the mounting bracket. - Install 2 (8mm) bolts into the threaded holes and tighten evenly. This will remove the rotor from the hub assembly.
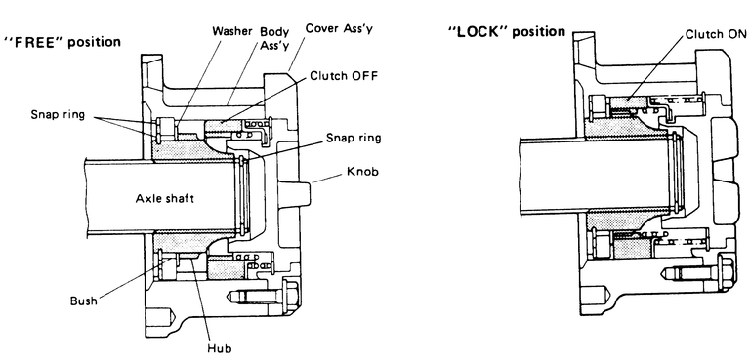
Cross-sectional view of the locking hub assembly used by Samurai models
- Thread a bolt into the axle shaft and pull the axle shaft out towards you. Remove the snapring.
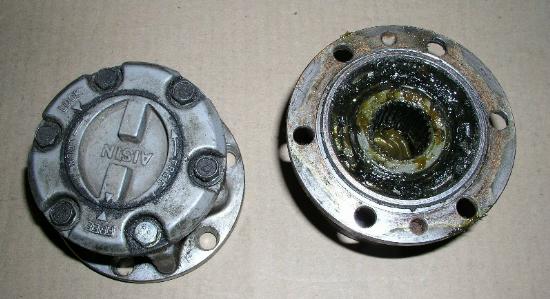
- Remove the locking hub body assembly.To install:
- Install a new gasket onto the locking hub assembly.
- Install the locking hub body assembly to the wheel hub flange and tighten the hub body bolts to 212 inch lbs. (24 Nm).
- Thread a bolt into the axle shaft and pull the axle shaft out towards you. Install the snapring and remove the bolt from the axle shaft.
- Install a new gasket in the manual locking hub cover.
- Before installing the locking hub cover, make sure of the following:
- The selector knob is in the FREE position.
- The clutch should be lifted (retracted) towards the cover. The clutch must be positioned properly to ensure proper hub operations.
- The gasket is centered and installed correctly.
- Install the locking hub cover and tighten the bolts to 115 inch lbs. (13 Nm).NOTE: The mark on the hub knob must be facing the FREE position.
- Check that the hub assembly is working correctly. If there are problems with the operation, Remove the hub cover and repeat steps 9–12.
- Install the brake rotor.
- Place the brake caliper into position and install the caliper mounting bolts.
- If removed, reconnect the locking hub assembly and install the front wheels.
- Lower the vehicle.
- Pump the brake pedal several times to seat the front brake pads. Road test the vehicle and verify proper operation.