Failure of the rubber shifter sheet (bushing) is a common problem with Samurai’s. Some owners have found good deals on Samurai’s because the previous owner couldn’t get the shifter to work. New shifter sheets can be found in either poly or brass.

Replacing the shifter sheet (bushing) isn’t difficult. The repair can be done by accessing the top of the shifter tower through the shifter boot hole from inside the vehicle.
Removal:
1) Disconnect the negative battery cable for safety.
2) Locate the transfer case shift lever inside the passenger compartment. If equipped, remove the console cover.
3) Remove the gear shift boot mounting bolts and slide the upper shifter boot upwards on the shift lever away from the center floor tunnel.
WARNING: When working with the shift boots, be careful not to force and tear them. The older the boot is, the more easily it can be damaged.
4) Check the lower shifter boot for a retaining clamp, and if equipped, release the boot clamp. Slide the lower boot, upward toward the shift knob in order to expose the shift lever guide.
NOTE: Depending on the amount of clearance that is available through the hole in the floor, it may be easier to access the lower boot and clamp from underneath the vehicle. If so, raise and support the vehicle safely using jackstands.
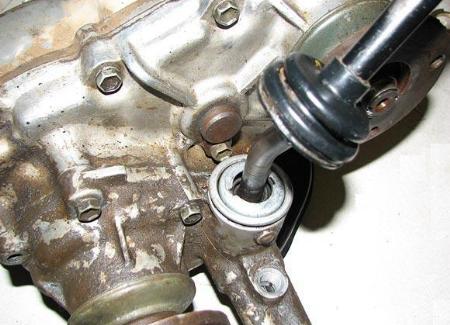
5) Push downward on the shift lever guide (the round housing which the lever passes through on the way into the top of the transfer case) and turn the guide counterclockwise to release it. There are two slots in the top of the cap. If necessary, use a pair of flat head screwdrivers and twist it counterclockwise while pushing down. It will rotate a quarter turn and then the whole shifter lever can be removed. With the guide released, pull upward to remove it and the shift control lever from the transfer case.
6) With the lever out of the way, you can see the shifter sheet down inside the housing. You can tell if your shifter sheet is original if you see a green version crumbling in pieces.
7) Remove the shifter sheet by simply fishing it out with your finger. There are a pair of pins inside the housing that keeps the shift lever straight. The flexible shifter sheet will just slide out around them.
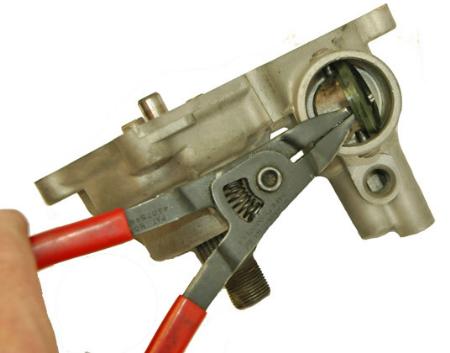
(You don’t need this tool to remove the shifter sheet. You can just fish it out with your finger)
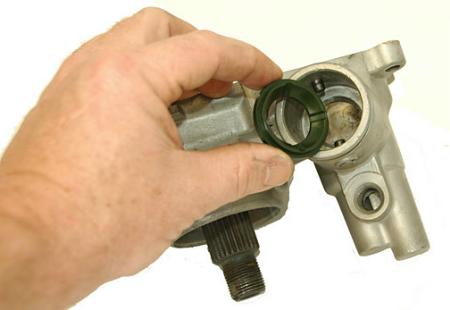
(The shifter sheet out of the housing)
8) Install the new shifter sheet.
Reassembly:
1) Clean and inspect the wear surfaces at the bottom of the shift lever. Apply a thin coat of lithium grease to the shifter ball friction surfaces at the bottom of the handle (between the shift lever and lever seat, as well as between the lever and lever case).
2) Insert the shift lever into position, then push downward on the guide while turning it clockwise to lock the assembly into the top of the transfer case.
3) Apply a thin coat of lithium grease to the lower boot on the surface which seals with the transfer case. Then slide the boot down the shift handle into position. If equipped, secure the boot retaining clamp. If the clamp was missing or damaged you should replace it with a similar type of band clamp (but in a pinch, a wire tie should be sufficient).
4) Slide the upper boot down the shift lever and into position. Secure the boot to the floor center tunnel using the retaining bolts.
5) If equipped, install the console cover.
6) Connect the negative battery cable.